 DejaDup is the default backup application for Gnome. It’s a GUI for duplicity, focuses on simplicity, supports incremental encrypted backups and up until recently supported a large number of cloud providers. Unfortunately as of version 42.0, all major cloud providers have been removed. Thus given that Ubuntu 20.10 ships with the specific version, any user who upgrades and has backups on Amazon S3 won’t be able to access them. In this blog post, we will provide a solution that will allow you to continue taking backups on AWS S3 using DejaDup.
The removal of the cloud providers should not come as a surprise. I’m not exactly sure which version of DejaDup deprecated them but it was around the release of Ubuntu 17.10 when they were all hidden as an option. So for 3 long years, people who had backups on Amazon S3, Google Cloud Storage, Openstack Swift, Rackspace etc could still use the deprecated feature and prepare for the inevitable removal.
So why complain you might ask? Well, first of all, when you update from an earlier version of Ubuntu to 20.10, you don’t really know that the all cloud providers are removed from DejaDup. Hence if something goes wrong during the update, you won’t be able to easily access your backups and restore your system.
Another big problem is the lack of storage options on the last version of DejaDup. They decided to change their policy and support only “consumer-targeted cloud services” but currently they only support Google Drive. So they eliminated all the cost efficient options for mass storage and kept only one single very expensive option. I’m not really sure how this is good for the users of the application. Linux was always about having a choice (too much of it in many cases), so why not maintain multiple storage options to serve both the experienced and inexperienced users? Thankfully because we are on Linux, we have option to fix this.
WARNING: I have not tested thoroughly the following setup so use it at your own risk. If the computer explodes in your face, you lose your data, or your spouse takes your kids and leaves you, don’t blame me.
With that out of the way, let’s proceed to the fix. We will use s3fs fuse, a program that allows you to mount an S3 bucket via FUSE and effectively make it look like a local disk. Thankfully you don’t have to compile it from source as it’s on Ubuntu’s repos. To install it, type the following in your terminal:
sudo apt install s3fs
Next, we need to configure your credentials. The s3fs supports two methods for authentication: an AWS credential file or a custom passwd file. In this tutorial we will use the first method but if you are interested for the latter feel free to view the s3fs documentation on Github. To setup your credentials make sure that the file ~/.aws/credentials contains your AWS access id and secret key. It should look like this:
[default]

aws_access_key_id=YOUR_ACCESS_KEY_ID

aws_secret_access_key=YOUR_SECRET_ACCESS_KEY
Once your have your credentials file you are ready to mount your backup bucket. If you don’t remember the bucket name you can find it by visiting your AWS account. To mount and unmount the bucket to/from a specific location type:
# mount

s3fs BUCKET_NAME /path/to/location


# unmount

fusermount -u /path/to/location
Mounting the bucket like this is only temporary and will not persist across reboots. You can add it on /etc/fstab but I believe this only works with the passwd file. If you want to use your AWS credentials file an easy workaround it to create a shortcut in your Startup Applications Preferences.
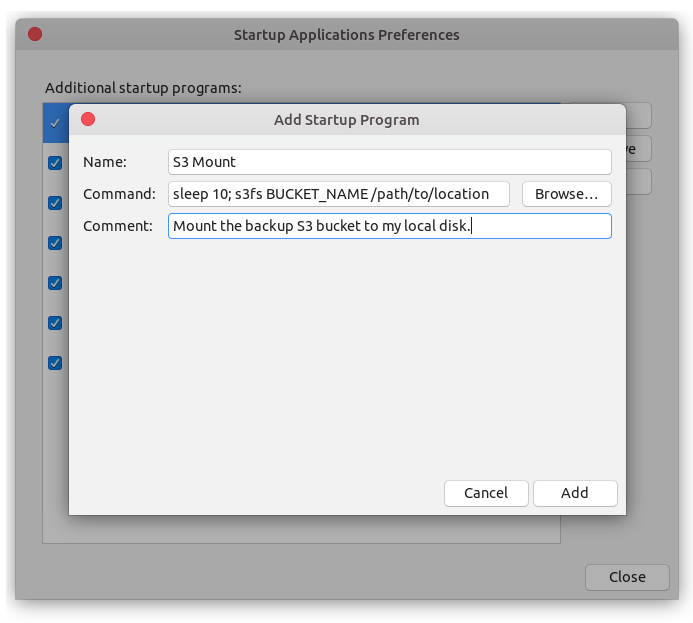
Note that you can add a small 10 sec delay to ensure that the WiFi is connected before you try to mount the bucket. Internet access is obviously necessary for mounting it successfully. If you are behind VPNs or have other complex setups, you can also create a bash script that makes the necessary checks before you execute the mount command.
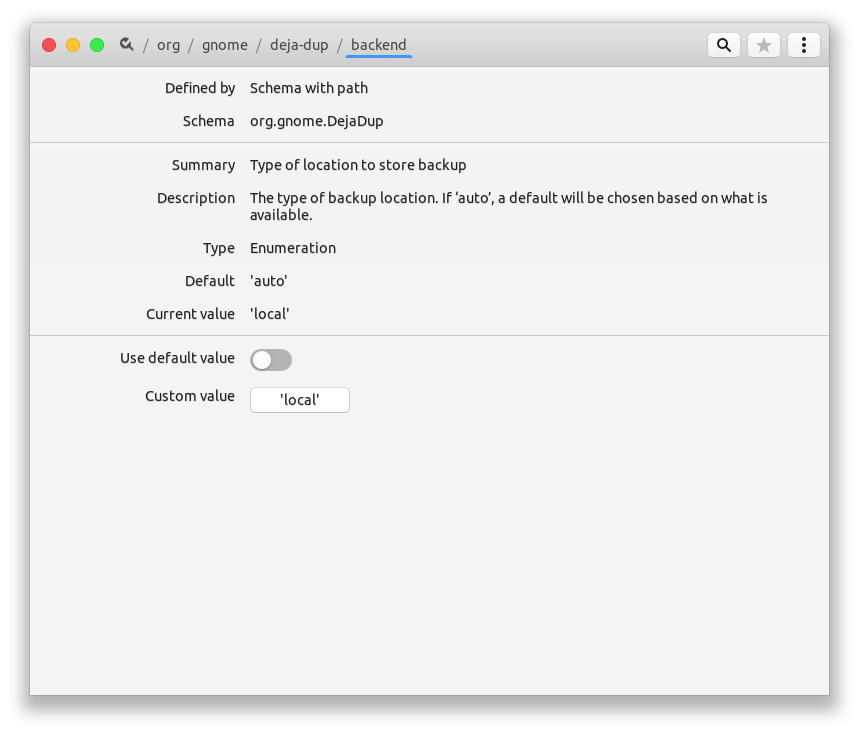
With the bucket mounted as a local drive, we can now easily configure DejaDup to use it. First of all we need to change the backend to local. This can be done either by using a program like dconfig or the console with the following command:
gsettings set org.gnome.DejaDup backend 'local'
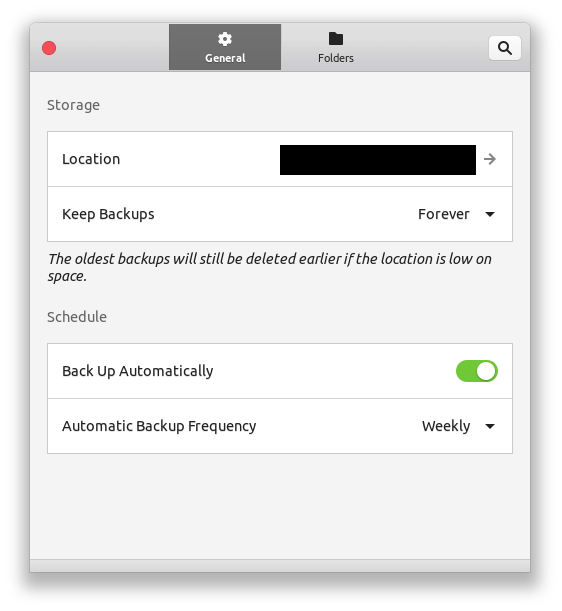
Finally we open DejaDup, go to preferences and point the storage location to the directory that has your S3 backup files. Make sure you select the subdirectory that contains the backup files; this is typically a subdirectory in your mount point that has name equal to your computer’s hostname. Last but not least, make sure that the S3 mount directory is excluded from DejaDup! To do this, check the ignored folders in Preferences.
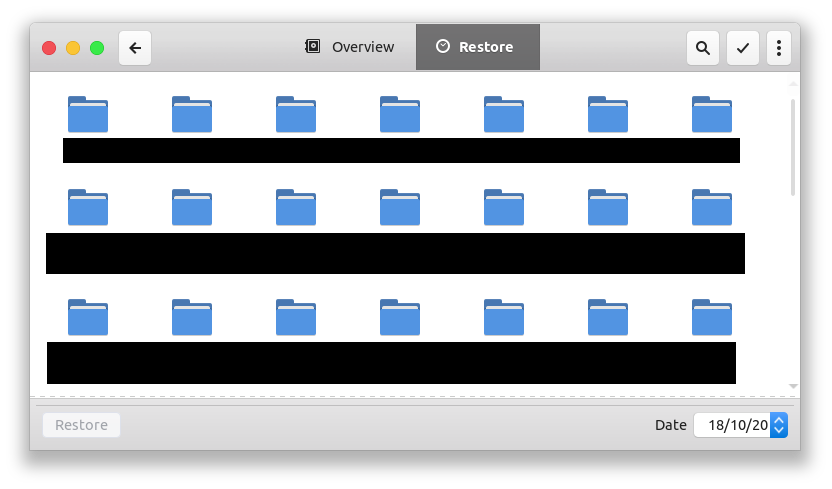
That’s it! Now go to your restore tab and DejaDup will be able to read your previous backups. You can also take new ones.
There are a few things to keep in mind in this setup:
If you have a recommendation for an Open-Source Backup solution that allows locally encrypted incremental backups, supports S3 and has an easy to use UI please leave a comment as I’m more than happy to give it a try.
My name is Vasilis Vryniotis. I'm a Machine Learning Engineer and a Data Scientist. Learn more


")


Datumbox offers an open-source Machine Learning Framework and an easy to use and powerful API.
Subscribe to our newsletter and get our latest news!
2013-2026 © Datumbox. All Rights Reserved. Privacy Policy | Terms of Use

Please, don’t sleep 10 seconds, avoid bash scripts to check the network, try to use a systemd unit file in the user session that depends on network-online.target (see https://www.freedesktop.org/wiki/Software/systemd/NetworkTarget/ ). Gnome should already be using it to handle the user session.
Well, maybe you are right on the “sleep” example. It was probably a lazy move from my side. I agree that systemd, for those who don’t hate it, can be a good option.
Bash scripts can also be useful, so I would not dismiss them. For instance, say you have a VPN kill-switch; the fact you are connected on the wifi/network does not mean your firewall allows you to go out on the net. Such checks can be implemented in bash or other scripting languages (Python?) without a problem. I did not want to go into the details on this post as it’s beyond the scope. 🙂
If anyone is looking for an alternative to Deja Dup + S3, you can try Oak Backup (https://www.oakbackup.com/).